Sunday, December 29, 2013

Tuna Supper Casserole

Tuna Supper Casserole
1 (10 oz.) package frozen spinach
1 can tuna, drained
1 small can sliced mushrooms
2 tablespoons lemon juice
3 tablespoons butter
1 tablespoon minced onion
2 tablespoons flour
1/2 teaspoon salt
1/8 teaspoon pepper
1 egg, slightly beaten
Cook spinach according to directions on package. Drain well.
Drain mushrooms, saving liquid. Add lemon juice and water to mushroom juice to make 1 cup liquid. In a
saucepan, melt 2 tablespoons butter, and blend in onion, flour, salt, pepper, and mushroom liquid. Cook,
stirring, until smooth and thick. Beat sauce into egg, then add mushrooms. Arrange spinach in a
casserole dish, then top with tuna. Pour sauce on top. Dot with 1 tablespoon butter and bake at 350
degrees for 30 minutes.

PINEAPPLE UPSIDE−DOWN CAKE

PINEAPPLE UPSIDE−DOWN CAKE
1 (14 oz.) can unsweetened crushed
pineapple in juice, undrained
1/4 C. pecan pieces (optional)
2 T. lemon juice
1 3/4 tsp. Equal Measure or 6 pkg. sweetener
or 1/4 C. Spoonful
1 tsp. cornstarch
4 T. margarine (at room temperature)
3 1/2 tsp. Equal Measure or 12 pkg.
sweetener or 1/2 C. Spoonful
1 egg
1 C. cake flour
1 1/2 tsp. baking powder
1/2 tsp. baking soda
1/4 tsp. ground cinnamon
1/4 tsp. ground nutmeg
1/8 tsp. ground ginger
1/3 C. buttermilk
Drain pineapple, reserving 1/4 cup juice.
Mix pineapple, pecans,1 tablespoon Equal and cornstarch in bottom of 8−inch
square or 9−inch round cake pan; spread mixture evenly in pan.
Beat margarine and Equal in medium bowl until fluffy; beat in egg.
Combine flour, baking powder, baking soda and spices in small bowl. Add to
margarine mixture alternately with buttermilk,1/4 cup reserved pineapple juice
and remaining 1 tablespoon Equal, beginning and ending with dry ingredients.
Spread batter over pineapple mixture in cake pan. Bake in preheated 350ºF oven
until browned and wooden pick inserted in center comes out clean, about
25 minutes. Invert cake immediately onto serving plate. Serve warm or at room
temperature. Yields 8 servings.
NOTE: If desired, maraschino cherry halves may be placed in bottom of cake
pan with pineapple mixture.
Nutritional information per serving: cals:156, prot:3 g, carbos:22 g, fat:7 g,
choles:27 mg, sod:257 mg

Thursday, December 26, 2013

Vegetable RollsBaked Crab Spring Rolls

Vegetable RollsBaked Crab Spring Rolls
1 Tbs vegetable oil or olive oil
1/2 red bell pepper, chopped fine
2 celery stalks from the heart, chopped fine
6 water chestnuts, chopped fine
1/2 small onion, chopped fine
1/4 cup fresh bean sprouts, chopped
2 cans lump crab meat - (6 oz ea), drained, flaked
2 Tbs dark soy, such as Tamari
1/2 tsp dried thyme leaves
4 sheets frozen phyllo dough - (13" by 17"), defrosted
3 Tbs melted butter

Preheat oven to 400 degrees.
Add oil to a preheated skillet over medium to medium-high heat. Saute pepper, celery, water
chestnuts, onion 2 to 3 minutes. Veggies should still have a little crunch. Transfer to a bowl. Add
bean spouts, crab, soy and thyme. Combine well with a spoon.
Paint half of a sheet of phyllo dough with melted butter and fold sheet in half. Pile a few spoonfuls
of filling 2 inches from the bottom of sheet and leaving 2 inches at either side of sheet. Fold
bottom flap up and side edges in, then roll up and over until you reach the top of the sheet. Your
crab pastry will look like a spring roll. Touch the edges and sides of your roll with melted butter
and place roll seam-side down on a pastry sheet.

Bake rolls 15 minutes or until lightly golden all over in the center of the oven.
Preparation time: 10 minutes
Cooking time: 20 minutes
Ready in: 30 minutes

Nutrition Facts

Nutrition (per serving): 304.7 calories; 41% calories from fat; 14.2g total fat; 83.0mg cholesterol;
867.0mg sodium; 538.2mg potassium; 27.3g carbohydrates; 4.1g fiber; 4.8g sugar; 17.8g protein.

Wednesday, December 25, 2013

Shrimp Toast

Shrimp Toast
Shrimp Toast
12 fresh uncooked large shrimp
1 egg
2 1/2 tablespoons cornstarch
1/4 teaspoon salt
Pinch pepper
3 slices sandwich bread
1 hard−cooked egg yolk
1 slice cooked ham (about 1 ounce)
1 green onion
2 cups vegetable oil
1. Remove shells from shrimp, leaving tails intact. Remove back veins
from shrimp. Cut down back of shrimp with sharp knife. Gently press
shrimp with fingers to flatten.
2. Beat 1 egg, cornstarch, salt and pepper in a small bowl until blended.
Add shrimp to egg mixture and toss until shrimp are completely coated.
3. Remove crusts from bread. Cut each slice into quarter. Place one
shrimp, cut side down, on each bread piece. Gently press shrimp to
adhere to bread. Brush or rub small amount of egg mixture over each
shrimp.
4. Cut egg yolk and ham into 1/2 inch pieces. Finely chop onion.
Place one piece each of egg yolk and ham and a scant 1/4 teaspoon
chopped onion on each shrimp.
5. Heat oil in wok over medium−high heat until it reaches 375F.
Fry 3 or 4 shrimp−bread pieces at a time in the hot oil until golden,
1 to 2 minutes on each side. Drain on absorbent paper.

Monday, December 23, 2013

Taco Quiche

Taco Quiche
Taco Quiche
8 flour tortillas
2 cups cheddar cheese, grated
1 pound hamburger
2 1/2 cups milk
1 cup sour cream
8 eggs
1 cup onion, chopped
1 clove garlic, minced
1 package taco seasoning
1 small head lettuce, shredded
1 can sliced olives (optional)
2 medium tomatoes (optional)
Preheat oven to 350 degrees. Line a 13x9x2-inch baking dish with the tortillas. In a skillet, cook
hamburger, onion, and garlic with taco seasoning. Simmer for about 10 minutes. Spread beef mixture
over tortillas. Sprinkle cheese on top. Beat eggs and milk together and pour over the top. Bake for 45
minutes. Let stand for 5 minutes before serving. Serve with sour cream, tomatoes, lettuce, and olives.

Friday, December 20, 2013

Grillmaster-Beyond The Basics Direct And Indirect Methods Of Grilling

Beyond The Basics Direct And Indirect Methods Of Grilling
Beyond The Basics Direct
 And Indirect Methods Of Grilling
When grilling you can use two
different methods to cook, they
are direct and indirect heat. For
direct heat cooking, food is placed
on the cooking rack directly over
the hot coals or fire. The indirect
method is used for more delicate
foods and for larger cuts of meat
that need longer cooking times,
such as when you're barbecuing a
thick roast.

The grill will always be kept covered when cooking with indirect heat.
Direct heat cooking is uncomplicated. Learning the temperature of the
coals is the only real skill. If you are using a gas grill, you just need to
set the heat settings at the proper level. The coals are ready when 3/4
of them are gray and coated with ash. You can check the temperature
of a charcoal grill by very carefully holding your hand just above the
grilling surface and counting the number of seconds it takes before the
heat becomes uncomfortable enough for you to pull your hand away.

5 seconds equals Low Heat
4 seconds equals Medium Heat
3 seconds equals Medium-High Heat
2 seconds equals High Heat

You can use the following descriptions to check cooking temperature
by observing the coals:
When the ash coating thickens and a red glow is just visible this would
equal a low heat.
When the coals are covered with light gray ash this would equal a
medium heat.
When the coals have a red glow visible through the ash coating this
would equal a high heat.

The proper method for indirect heat cooking on a charcoal grill is to
place an equal number of charcoal briquettes on each side of the grill
pan and leaving a space in the center, light the briquettes and wait
until they are at cooking temperature. When you are ready to start
cooking, place a drip pan between the coals and add 1/2" of water to
the pan. Place your food over the drip pan and then cover the grill. You
will need to add 5 or 6 briquettes to each side of the pan as needed to
maintain even heat. As a general rule, briquettes should be added
every 45 minutes.

For indirect heat cooking on a dual burner gas grill, set the drip pan on
the lava rocks on one side of the grill and add water to 1/2". Preheat
the other burner on high for 5-10 minutes. Turn the temperature down
to medium, then put the food on the rack over the drip pan and cover
the grill.

For indirect heat cooking on a single burner gas grill, preheat the grill
on high for 5-10 minutes. Turn the temperature down to low, and
place a large foil baking pan on the rack. You can also line half of the
cooking rack with a double thickness of heavy duty foil. Place food in

If you like this recipe submit a comment 
thank you

Wednesday, December 18, 2013

COLORFUL CHICKEN STEW

COLORFUL CHICKEN STEW
1 lb. boneless skinless chicken breasts, cubed
1 (14 1/2 oz.) can Italian diced tomatoes, undrained
2 medium potatoes, peeled and cut into 1/2−inch cubes
5 medium carrots, chopped
3 celery ribs, chopped
1 large onion, chopped
1 medium green bell pepper, chopped
2 (4 oz.) cans mushroom stems and pieces, drained
2 low−sodium chicken bouillon cubes
Artificial Sweetener equal to 2 tsp. sugar
1 tsp. chili powder
1/4 tsp. pepper
1 T. cornstarch
2 C. cold water
In a 5−quart crockpot, combine the first 12 ingredients.
In a small bowl, combine cornstarch and water until smooth. Stir into
chicken mixture. Cover and cook on LOW for 8 to 10 hours or until
vegetables are tender. Serves 10.
Nutritional Analysis: One 1−cup serving equals: 123 calories,
209 mg sodium, 25 mg cholesterol, 16 gm carbohydrate, 11 gm protein,
1 gm fat, 3 gm fiber.
Diabetic Exchanges: 2 vegetables, 1 very lean meat, 1/2 starch.

Baked Macaroni, Cheese & Spinach

Baked Macaroni, Cheese & Spinach
1 pound elbow macaroni
15 oz. low fat ricotta cheese
1 3/4 cups skim milk
1/2 cup egg substitute
2 teaspoons brown mustard
1 −2 teaspoons Tabasco sauce
1/2 teaspoon salt
1/4 teaspoon ground pepper
2 cups shredded low fat cheddar cheese
2 cups torn fresh spinach leaves
1/4 cup grated Parmesan cheese
1/4 cup fine bread crumbs
1 teaspoon paprika
Preheat oven to 375F. Spray a 9 X 13 or 3 quart baking dish with
nonstick spray oil. Cook macaroni according to package directions.
Meanwhile, in a food processor or blender, mix ricotta cheese,
milk, egg substitute, mustard, Tabasco sauce, salt and pepper.
Process until smooth. Drain macaroni, return to pot and add
shredded cheddar and spinach. Stir until cheese melts and spinach
wilts. Stir in ricotta mixture and scrape into prepared baking
dish. In a small bowl, combine Parmesan cheese, bread crumbs,
and paprika. Sprinkle evenly over macaroni and cheese. Bake at
375F for 25 minutes. Serve hot.

Tuesday, December 17, 2013

APPLE PIE

APPLE PIE
APPLE PIE
2 lb. McIntosh apples, peeled, cored
and thinly sliced (7 cups)
2 T. lemon juice
2 T. granulated sugar
1 T. Butter Buds Sprinkles
4 packets Sweet 'N Low
1 T. all−purpose flour
1 1/2 tsp. ground cinnamon
1/8 tsp. ground allspice
4 sheets phyllo dough, thawed
Nonfat frozen vanilla yogurt (optional)
Preheat the oven to 375ºF. Spray a 9−inch pie pan with nonstick
cooking spray.
In a large bowl, toss the apples with the lemon juice.
In a small bowl, combine the sugar, Butter Buds, Sweet 'N Low, flour,
cinnamon and allspice. Add to the apples and toss to coat.
Lightly spray one sheet of phyllo dough with nonstick cooking spray.
Fold in half and spray again. Place in the pie pan with one edge
hanging over the pan. Repeat the process with the remaining 3 sheets
of dough, overlapping in the pan to cover the bottom completely.
Spoon the apple mixture into the pan. Fold the edges of the dough
over to cover the apples. Spray with nonstick cooking spray. Bake
35 minutes, or until the dough is crisp and the apples are tender
when pierced with a sharp knife. Cool slightly before serving.
Serve with nonfat frozen vanilla yogurt, if desired. Makes 1 (9−inch) pie,
8 servings.
Variation
Seven cups of sliced fresh peaches or pears, or fresh blueberries,
may be substituted for the apples.
Per serving (1/8 pie): 115 calories, 1g protein, 29g carbohydrate,
1g fat, 1g saturated fat, 0mg cholesterol, 65mg sodium
Diabetic exchanges: 1/2 starch, 1 1/2 fruit

If you like it submit a comment 
thank you

Easy Vegetable Beef Soup

Easy Vegetable Beef Soup
1 large beef soup bone
2 lbs boneless beef stew meat
2 1-lb bags frozen soup vegetables
1 1-lb bag frozen gumbo vegetables
1 qt crushed or diced tomatoes
1 large + 1 small cans tomato paste
1 1-lb bag of cut okra (optional)
3 cans chicken broth
salt and ground black pepper to taste
2 medium onions, coarsely chopped
3 stalks celery, sliced
2 medium or 1 very large green pepper
4-5 bay leaves
4-5 finely garlic cloves, finely chopped
1 pod red or jalapeno pepper
Put soup bone and last 6 ingredients in a large stock pot with about 6 quarts of water. Bring to boil and cook until meat falls off bone. Cool. Remove meat and chop into small bite size pieces. Discard bones and fatty pieces of meat.
Add 3 quarts hot water to existing stock. Add chopped meat, and soup and gumbo vegetables. Bring to boil and cook for 45 minutes. Add okra, tomatoes, tomato paste, and salt and pepper to taste. Cook until all vegetables are tender.
Makes 18-20 servings.


If you like it submit a comment 
thank you

Monday, December 16, 2013

Cashew Chicken

Cashew Chicken
Cashew Chicken
3 Chicken breasts, boned and skinned
1/2 lb. Chinese pea pods
1/2 lb. Mushrooms
4 Green onions
2 cups Bamboo shoots, drained
1 cup Chicken broth
1/4 cup Soy sauce
2 tb Corn starch
1/2 ts Sugar
1/2 ts Salt
4 tb Salad oil
1 pack Cashew nuts (about 4−oz)
Slice breasts horizontally into very thin slices and cut into inch squares.
Place on tray. Prepare vegetables, removing ends and strings from pea pods,
slicing mushrooms, green part of onions, and the bamboo shoots. Add to tray.
Mix soy sauce, cornstarch, sugar, and salt. Heat 1 tbls of oil in skillet
over moderate heat, add all the nuts, and cook 1 min shaking the pan,
toasting the nuts lightly. Remove and reserve. Pour remaining oil in pan, fry
chicken quickly, turning often until it looks opaque. Lower heat to low. Add
pea pods, mushrooms, and broth. Cover and cook slowly for 2 mins. Remove
cover, add soy sauce mixture, bamboo shoots, and cook until thickened,
stirring constantly. Simmer uncovered a bit more and add green onions and
nuts and serve immediately.

If you like it submit a comment 
thank you

Thin Crust Dough

1 envelope dry yeast
Thin Crust Dough
Thin Crust Dough
1/4 teaspoon sugar
3/4 cup lukewarm water (105 F)
Stir yeast and sugar into water, let sit for 8 minutes or so.
In a bowl (or food processor) mix
1 3/4 cups unbleached all−purpose flour or bread flour
1/2 teaspoon salt
Add the yeast mixture. If using food processor, continue running
until dough forms a ball, 10−20 seconds. By hand, mix with a
sturdy spoon until ready to knead.
On a floured surface turn out dough. Knead dough for 2 minutes or so.
If dough is a little sticky, dust your fingers and counter with flour,
(but as little as possible).
Roll out by hand for a 12" pizza. Place in lightly oiled pizza pan
using your fingertips to press up to the edge and forming a shallow
lip. Sauce, cheese, and top with desired ingredients.
Bake at 500F in pre−heated oven for 8−12 minutes, the edges will
turn a nice golden brown when done. Dough will be firm and crispy,
not soggy and soft like many other doughs.

If you like it submit a comment 
thank you

Grillmaster - Tips For Cooking The Food

Tips For Cooking The Food
Whether you are using a charcoal
grill or a gas grill, there are certain
tips you need to know that will
make you a better grill master.
Below we have provided you with
these tips. Follow them and you will
be forever known by your family
and friends as the"grillmaster"
The addition of wood chips and chunks to your coals can add awesome
flavor to your food. You should soak mesquite, alder, hickory and
pecan chips for one hour before scattering over the hot coals.
Soak wood skewers in water for an hour before use. They are best
used for foods that can be cooked quickly, like vegetables and fruits.
Use flat metal skewers when cooking meat kabobs. Round skewers will
let the food turn and will not provide even cooking.
You should follow the recipes cooking times carefully, and make sure
you cover the grill if the recipe calls for it.
When using sauces containing sugar and fat, apply them only during
the last 10 minutes of cooking, unless the recipe instructions are
different, or you will cause flareups and the food may burn.
Weather can affect grilling times and so can the length of time the food
is being cooked. Here are some rules for maintaining cooking
temperature:
• To lower the cooking temperature, you can raise the cooking
grate, spread the coals farther apart, or adjust the vents on
the grills pan to halfway closed.
• If you need to raise the temperature,you can lower the
cooking grate, tap ash from the coals, move the coals closer
together, or adjust the vents so that they are opened further.
You can also add more charcoal to the outer edges of the hot
coals.
• When the weather is cold, you will need to use more
briquettes to achieve an ideal cooking temperature. Grilling
will also take longer. Wind will tend to make the fire hotter and
on a humid day, the coals will burn slower.
• The thickness and the temperature of the food when it is
placed on the grill will affect it's cooking time. The colder and
thicker the food, the longer it will take to cook.
• The closer the cooking grate is to the coals, the quicker the
food will cook.
• Fires using hardwood will burn hotter than charcoal briquettes.
• Using a thermometer is the most reliable way to test when
your food is done.
• Always follow the recipes instructions for testing doneness.
• Moving the food around on the grill will give you the most
even cooking results, but don't turn the food to often or use a
fork to move the food. Using a fork will release juices that you
want in the food. Use a set of tongs or a spatula to move the
food.

If you like it submit a comment 
thank you

Sunday, December 15, 2013

Baked Walleye with Carrots

1 1/2 pounds walleye fillets, skin removed
Baked Walleye with Carrots
2 cups grated carrots
3 tablespoons margarine or butter, melted
2 tablespoons lemon juice
1/4 teaspoon ground thyme
Salt to taste
3 tablespoons margarine or butter
3 1/2 tablespoons flour
Salt and pepper to taste
1/3 cup milk
Heat oven to 450F. Spray a 13 x 9−inch baking dish with nonstick
vegetable cooking spray. Arrange fillets, slightly overlapping,
in prepared dish. Set aside. In medium bowl, combine carrots, melted
margarine, juice, thyme and salt. Spread mixture evenly over fillets.
Cover with foil. Bake for 25 to 30 minutes, or until fish is firm
and opaque and just begins to flake. Drain liquid from fish into
a 2−cup measure. Cover fish with foil to keep warm. Set aside. Add
water to liquid in cup to equal 1 1/3 cups.
In a 1−quart saucepan, melt 3 tablespoons margarine over medium
heat. Stir in flour, salt and pepper. Blend in cooking liquid mixture
and milk. Cook for 5 to 7 minutes or until mixture thickens and
bubbles, stirring constantly. Pour sauce evenly over fish and serve
over hot rice or linguine.

If you like it submit a comment 
thank you

Baked Mahi−Mahi with Dill Sauce

Baked Mahi−Mahi with Dill Sauce

1/4 cup sour cream
1/4 cup plain yogurt
1 tablespoon mayonnaise or salad dressing
1 tablespoon minced fresh dill or 1 teaspoon dried dill
1/2 teaspoon Dijon mustard
1/8 teaspoon bottled hot pepper sauce
Salt & pepper to taste
2 Mahi−Mahi Steaks
1 tablespoon vegetable oil
1 tablespoon lemon juice
Salt
White pepper
Combine our sour cream, yogurt, mayonnaise, mustard, and hot
sauce. Stir in dill; add salt and pepper to taste. Blend well.
Allow to stand at least 1/2 hour to blend flavors. Serve at room
temperature. May be refrigerated up to 24 hours.
Pat fish dry with paper towels. Combine oil and lemon juice; brush
on both sides of fish. Season lightly with salt and white pepper.
Place an inch apart in a lightly oiled baking dish. Bake at 450F
for approximately 15 mintues. When fish tests are done, transfer
to warm plates. Spoon Dill Sauce over fish.

Sesame-Cheese Dip Mix

Sesame-Cheese Dip Mix


1 tb grated parmesan cheese
1/2 ts salt
1 dash pepper
2 ts toasted sesame seeds
1/2 ts celery seed
1/8 ts garlic powder
Combine all ingredients in a small bowl; blend well. Spoon mixture onto a
6-inch square of aluminum foil and fold to make airtight. Label as Sesame
Cheese Dip Mix. Store in a cool, dry place and use within 4 months.
Makes 1 package (about 2 T) of mix. This recipe can be increased to make
more packages.
Sesame-Cheese Dip: Combine 1 cup of sour cream and 1 package of mix.
Chillat least 1 hour before serving.
Makes about 1 cup of dip.

Friday, December 13, 2013

CHICKEN CASSEROLE

CHICKEN CASSEROLE
CHICKEN CASSEROLE

1 (2-2 1/2 lbs.) chicken, boiled and off bone
1 can cream of mushroom soup1 can cream of1 can cream of mushroom soup1 can cream of chicken soup
1 (8 oz.) sour cream
1 (8 oz.) Cheez Whiz
1 stick butter or margarine
1 1/2 sleeves of Ritz crackers or saltines
Poppy seeds
Put bite size pieces of
1 (8 oz.) sour cream1 (8 oz.) Cheez Whiz1 stick butter or margarine1 1/2 sleeves of Ritz crackers or saltinesPoppy seedsPut bite size pieces of1 (8 oz.) sour cream1 (8 oz.) Cheez Whiz1 stick butter or margarine1 1/2 sleeves of Ritz crackers or saltinesPoppy seedsPut bite size pieces of chicken in bottom of 9 x 13 inch pan. Mix the soups (undiluted),
the sour cream, and the Cheez Whiz together in medium sized bowl. Put this mix on
top of
the sour cream, and the Cheez Whiz together in medium sized bowl. Put this mix ontop ofthe sour cream, and the Cheez Whiz together in medium sized bowl. Put this mix ontop of chicken. Sprinkle poppy seeds over soup mixture. Melt stick of butter. Crush
crackers. Mix together, then sprinkle evenly over
crackers. Mix together, then sprinkle evenly overcrackers. Mix together, then sprinkle evenly over chicken casserole. Bake in 350
degree oven for 20-30 minutes, until bubbly and brown. Serves 6. This is a family
favorite!
degree oven for 20-30 minutes, until bubbly and brown. Serves 6. This is a familyfavorite!degree oven for 20-30 minutes, until bubbly and brown. Serves 6. This is a familyfavorite!

Grillmaster - Building The Fire

Building The Fire
Building The Fire

Before you can become a grill
master you will need to know how
to properly build a fire. The fire is
the beginning of the grilling
process. Without a proper fire,
you can not expect to be a real
grill master. Even if you use a gas
grill it is an important skill that will
make you a better griller.
Building your charcoal fire is more than just opening up the bag,
dumping in the charcoal, dousing them with lighter fluid and throwing
on a match, although that is how many people do it. Then after 15-20
minutes they shake the grill to settle the coals and go to grilling. Do it
this way and you will probably end up with burned burgers or raw
chicken, but sometimes you might get lucky and your food will turn out
okay. Wouldn't it be better to know that you will get good food every
time?
The key to good grilling is to have an even fire. The only time you
should have any variation in heat is when you plan for it. If you just
dump your coals in randomly you will have hot and cool spots. If you
evenly distribute the coals you can minimize any variation and get
good, even grilling. This is very important when you are cooking a
large amount of food on the grill.
The number of charcoal briquettes you use will depend on the size of
your gill, the amount of food you will be cooking, weather conditions
and cooking time.
As a general rule of thumb, plan on using about 30 briquettes to cook
1 pound of meat. A standard five-pound bag contains 75 to 90
briquettes. You want to make sure that you have enough briquettes to
cover the grills pan in a single layer and extending out about 2"
beyond the area of the food on the grill. The first step is to place the
briquettes in the grills pan to determine the quantity and then stack
them up in a rough pyramid shape to light. Soak the briquettes with
approximately 1/2 cup of lighter fluid, and let set for a few minutes
before lighting.
After the coals have begun to burn and ash starts to form, you will
need to arrange them with long handled tongs into a single layer.
Once you have mastered even heating its time to step up to the
professional level. A Pro likes to have a controlled temperature
variation, a hot area and a not so hot area. In grilling this is called a
two level fire. If you have a dual burner gas grill just set one burner on
high and the other on medium. The advantage to this is that you will
have one area to sear foods and another area to cook them through.
For a charcoal grill you will want to set up half of your fire grate in a
single layer of coals and the other half in two or three layers of coals.
This will give you the hot and medium areas to do your cooking. This
method is also good if you are cooking different types of foods at the
same time.
For instance if you were grilling fajitas, you would sear the steak over
the high heat and cook the peppers over the lower heat. After you
have mastered the two level fire you will certainly see the advantage
of this method.
The other type of fire you need to learn how to build is the indirect
fire. The simplest form of this of this fire is to put all the coals on one
side of the grill and no coals on the other side. For a gas grill this is
equivalent to turning the burner on one side on and leaving the other
off. With a charcoal grill you can do much more than this. The ring of
fire is an excellent strategy for an indirect fire if you are using the
kettle style of grill. To build this type of fire, after you have hot coals,
push the coals to the outside of the coal grate leaving the middle
empty. This method gives you an even heat around the entire grill
and a good indirect cooking space.
When building an indirect fire one of the most common problems is
having the fire on just one side of the grill. If you are using a gas grill
there isn’t a lot you can do to avoid this. The problem with this is that
the heat will be uneven and one side of the food you are cooking will
get more heat than the other. This will require you to turn the food
often to have it cook evenly. When you use a charcoal grill you can
build the fire everywhere except under the food you are cooking and
this gives you a more even heat.
Another thing to consider when building a fire is using hardwood. Using
slow burning wood chips will add a smoky flavor to your food. If you
are going to add wood chips to your fire then you will want to have a
place to do that. For a gas grill you can use a firebox or wrap the
moistened wood chips in foil. For a charcoal fire you will just need to
leave a small area of the coal grate with just a coals. This makes a
good place to put wood chips and they will smoke but not burn away
quickly.
Tuesday, December 10, 2013

Bath Cookies

Bath Cookies
Bath Cookies

2 cups finely ground sea salt1/2 cup baking soda1/2 cup cornstarch2 tbs. light oil1 tsp. vitamin E oil2 eggs5-6 drops essential oilPreheat oven to 350 F. Mix together all the ingredients. Take a teaspoonof the dough and roll it gently into a ball about 1" in diameter. Continuedoing this with all the dough and place the balls on an ungreased cookiesheet. (You can decorate the cookies with clove buds, anise seeds, or driedciturs peel if you wish.) Bake the cookies for 10 minutes, until they arelightly browned. Do not overbake. Allow the cookies to cool completely.To use, drop 1 or 2 cookies into a warm bath and allow to dissolve. Do noteat! Yield: 24 cookies, enough for 12+ baths.

Basil and Lime Bath Salts

Basil and Lime Bath Salts
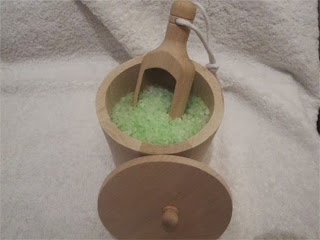
You will need:5 cups of Sea Salt (or Epsom salt, or a combination of both)1 Tsp. of Baking Powder2 Tsp. of Almond Oil5 drops Lime Scented Oil4 drops Basil Oil1 drop green coloring1 drop yellow coloringAll you have to do is mix the salt and the baking powder in a bowl. In aanother smaller bowl mix together all liquids and add to salts, stirringwell. You should let them sit so they can soak up the scent and the coloringallof the way through. After they have sat for about two hours take them andplacethem in jars with cork stoppers. To create a good seal dip the cork in meltedwax (greento match salts) and put cork into bottle.

Saturday, December 7, 2013

Grillmaster - The Basics Of Grilling

The Basics Of Grilling


  Grilling is just like any other kind
of cooking, it is a learned art.
Keep this in mind as you are
learning. You are sure to have
some failures. The major difference
between grilling and cooking on
the stove or in the oven is that
grilling is a combination of the two.

You have direct heat from the gas burners or the charcoal and you
have indirect heat that fills the grill when the lid is put down. Grills alsohave higher heat and less control over that heat. With your oven youcan set the temperature precisely, but with a grill you either turn on orlight the fire and the heat will just keep rising.

The average gas grill can reach temperatures of 500 degrees in a just
a few minutes. This is why you can't throw the food on the grill and
walk away until the timer goes off. You must remain ever attentive.
Monitoring is the key. The high heat, both direct and indirect is the
basis of grilling.

You want to use this high heat to cook the food quickly, but, because
foods will cook fast on a grill, you will have to turn them to get them to
cook evenly and without burning. Although, if you turn the food too
often you will just slow the process of cooking and this can lead to food
that is tough and dry. The trick is to turn only when necessary. To
check when the food is ready to be turned you will need to get down
low, by the edge of the grill, being careful not to burn yourself, and lift
up the corner of the meat. When the lines from the grills cooking grate
start to turn black it's time to turn the food.

Knowing when to turn and when your food is cooked is the whole skill
of successful grilling. The rest is just recipes and tricks. This skill
however is also the hardest thing to teach, especially in a book. Ideally
a steak should be turned only once. If you are cooking a thick cut of
meat (over 1-1/2 inches) you may need to turn it three times to
ensure it is cooked through to the center.

As a beginning grill master you should start simple. Thinner cuts of
steaks, pork chops and burgers under 3/4 inches will let you get the
"hang" of grilling and still get your food properly cooked. After you
become experienced with these thinner cuts you can move on to more
difficult foods.

Here are some useful tips for the beginning griller:

Tip 1: Keep your grill clean. A clean grill will give you better tasting
food and is less likely to cause your food to stick to the grate.

Tip 2: Applying cooking oil or spray to the grill before it is lit will keep
low fat meats and other foods from sticking.

Tip 3: Allow for plenty of time. You don't want to rush your grilling or
keep your family or guests waiting.

Tip 4: Don't leave your grilling unattended for any length of time. A
flare-up can occur at anytime and leave you with burnt food if you are
not there to attend to it.

Tip 5: Flare-ups are caused by grease and heat. Trimming excess fat
from the meat and moving the meat to a different area of the grill
when turning is the best way to control flare-ups. Do not use a spray
bottle of water to control a flare-up.

Tip 6: Don't add sugary or oily sauces or marinades to meat on the
grill. This will just cause burning.

Tip 7: Apply spices or marinades to your food at least one hour before
grilling. If using barbecue sauce, you should soak the food overnight.
This will assure that the flavor gets into the food.

Tip 8: Using the proper tools is important. A fork should never be used
for grilling. A long set of tongs is the best for turning steaks, chicken
and other cuts of meat. A long handled spatula is best for burgers.

Friday, December 6, 2013

Anne's Vegetable Dip


Anne's Vegetable Dip


Yield: 2 cups
1 c homemade mayonnaise
1 c sour cream
1 lg garlic clove - peeled and
-finely chopped
1 tb finely chopped green onion
1 tb dijon mustard
1 chopped fresh parsley
In a mixing bowl, thoroughly combine first 5 ingredients. Pour into
serving bowl, cover and chill until serving time. The flavor improves
if this is made ahead of time and gets to sit for awhile.
To serve, garnish with chopped parsley.

Amaretto Fruit Dip

Amaretto Fruit Dip

16 oz Cool Whip -- thawed in
: refrigerat
3 3/8 oz Lemon Jello Instant
: Pudding/Pie Filling
8 oz sour cream
1/4 c amaretto
Gently whisk together sour cream and amaretto in a medium sized bowl.
Stir in instant pudding mix. Gently but thoroughly stir in Cool Whip.
Cover and refrigerate several hours or overnight to combine flavors.
Serve with sliced fresh fruit.

Thursday, December 5, 2013

Ranch Dip For Vegetables

Ranch Dip For Vegetables


--------------------------------INGREDIENTS---------------------------------
1 (24 oz.) carton 1% cottage
-cheese
8 tb lite sour cream
1 (1 oz.) pkg. dry ranch
-dressing mix
------------------------RAW VEGETABLES: CELERY STIC------------------------
1 green pepper, etc. for
-dipping
--------------------------------PREPARATION---------------------------------
Use food processor and cream entire carton of cottage cheese until it
becomes very smooth and creamy. Blend and cream for about 5 minutes
or longer. Add lite sour cream. Blend until well mixed. Add dry ranch
dressing mix and blend. Serve as a dip for raw vegetables or use on
baked potato. Also good with pretzels.

ORANGE FROTH SAUCE


Take juice of 2 oranges, 2 eggs, sugar to taste, 1 teaspoonful of white flour (not corn flour), add to the
orange juice enough water to make 1/2 pint of liquid; mix this well with the sugar, the eggs previously
beaten, and the flour smoothed with a very little water; put the mixture over the fire in an enameled
saucepan, and whisk it well until quite frothy; do not allow the sauce to boil, as it would then be spoiled.
Serve immediately.

Wednesday, December 4, 2013

TERIYAKI CHICKEN


1 chicken, cut up or 2 lbs. Teriyaki beef or top sirloin steak sliced thin
2 tsp. grated fresh ginger
1 clove garlic, chopped fine
1 medium onion, chopped
1/3 c. soy sauce
1/4 c. sugar
1/4 c. sake
--QUICK TERIYAKI MARINADE--
1 c. soy sauce
1 1/2 - 1 1/4 c. brown sugar
1 tsp. oyster sauce
1 tsp. mirin (sweet rice wine)
1 clove chopped garlic
Grated fresh ginger
Mix all ingredients except meat. Stir and cook over low heat until sugar is dissolved.
Cool. Pour over meat and marinate for at least 1 hour. Best when cooked over
charcoal. Use remaining marinade for basting. If you use the Quick Teriyaki
Marinade, mix together and marinate meat for about 1/2 hour. Best when meat is
cooked over charcoal. Baste often.

TARRAGON CHICKEN

TARRAGON CHICKEN

2 whole chicken breasts, boned skinned and pounded to 1/4 inch thickness
All purpose flour
4 tbsp. butter, divided
1/2 lb. sliced mushrooms
2 tbsp. all purpose flour
1 c. chicken broth
1 1/4 tsp. minced fresh tarragon or 1/4 tsp. dried tarragon
1/2 c. half and half
Salt and freshly ground black pepper to taste
2-4 Servings. Dredge chicken breasts in flour and brown in 2 tablespoons butter.
Remove chicken to warm platter. Add remaining 2 tablespoons butter and saute
mushrooms. Sprinkle mushrooms with 2 tablespoons flour, blend well. Gradually add
chicken broth, then tarragon, cook until thickened. Slowly add half and half, and season
with salt and pepper. Return chicken to pan and heat through. Sauce should be only
slightly thick.

ORIENTAL CHICKEN WINGS

ORIENTAL CHICKEN WINGS


6 chicken wings
1 sm. clove garlic
1 scallion
1/4 c. soy sauce
2 tbsp. honey
2 tsp. rice-wine vinegar
1/2 tsp.g rated ginger
1/2 tsp. oriental sesame oil
Pinch of cayenne
1 tsp. sesame seeds
1 tbsp. chopped fresh coriander or parsley
Remove wing tips and cut wings in half at the joint. Mince garlic and scallion. Combine
soy sauce, honey, vinegar, garlic, ginger, oil and cayenne in a microwave safe dish.
Add wings and turn to coat. Marinate at least 30 minutes, turning twice. Put larger
wings at the edge of the dish. Cover with plastic and vent. Microwave on high for 5
minutes.
Rotate plate and cook 5 minutes longer. Transfer wings to a serving plate. Return
marinade to oven and cook, partially covered on high for 2 minutes. Pour marinade
over wings and turn to coat. Sprinkle with sesame seeds, scallion and coriander. 12
pieces.

ORIENTAL CHICKEN TENDERS CURRIED PEANUT CHICKEN

ORIENTAL CHICKEN TENDERS CURRIED PEANUT CHICKEN

1 c. soy sauce1/3 c. sugar4 tsp. vegetable oil1 1/2 tsp. ground ginger1 tsp. five spice powder2 bunches green onion16 chicken tenders (approx. 2 lbs.)Blend soy sauce, sugar, oil, ginger and five spice powder in a large bowl until the sugardissolves. Stir in green onions. Add chicken tenders to marinade. Turn to coat. Coverchicken and refrigerate overnight. Preheat oven to 350 degrees.Drain chicken RESERVING MARINADE. Arrange chicken in dish and bake until brownand tender, while basting occasionally with marinade.Another variation of the same recipe:4 halves, skinned & boned chicken breasts2 c. half & half1 1/2 c. mayonnaise3 tbsp. mango chutney2 tbsp. dry sherry1 tbsp. sherry vinegar2 tbsp. plus 1 tsp. curry powder1 tsp. turmeric2 c. finely chopped salted roasted peanutsPreheat oven to 350 degrees. Place chicken breasts in a shallow baking dish just largeenough to hold them. Pour half and half over them and bake for 30 minutes. Let cooland cut in 1 inch cubes.Process mayonnaise, chutney, sherry, vinegar, curry powder and turmeric in a blenderor food processor. Dip chicken pieces into the curry mayonnaise and roll in thechopped nuts. Refrigerate 30 minutes. Arrange on a serving plate with fancytoothpicks.

Twitter Delicious Facebook Digg Stumbleupon Favorites More

 
Design by Free WordPress Themes | Bloggerized by Lasantha - Premium Blogger Themes | JCpenney Printable Coupons